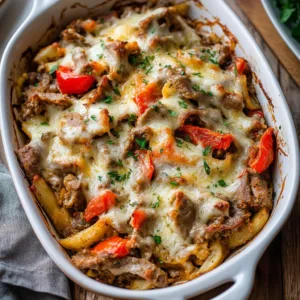
Imagine coming home after a long, grueling day at work, the kids are asking what is for dinner, and you have absolutely zero energy. You want something comforting, delicious, and fast, but the thought of standing over a hot stove for an hour makes you want to order takeout for the third time this week. Don’t pull out that delivery app just yet. This comforting Biscuit and Vegetable Pot Pie Casserole is the ultimate lifesaver for busy weeknights when you need a home-cooked meal without the kitchen drama. It delivers all the nostalgic, cozy flavors of a classic homemade pot pie but cuts the prep time in half by transforming it into a family-friendly casserole.
What is Biscuit and Vegetable Pot Pie Casserole?
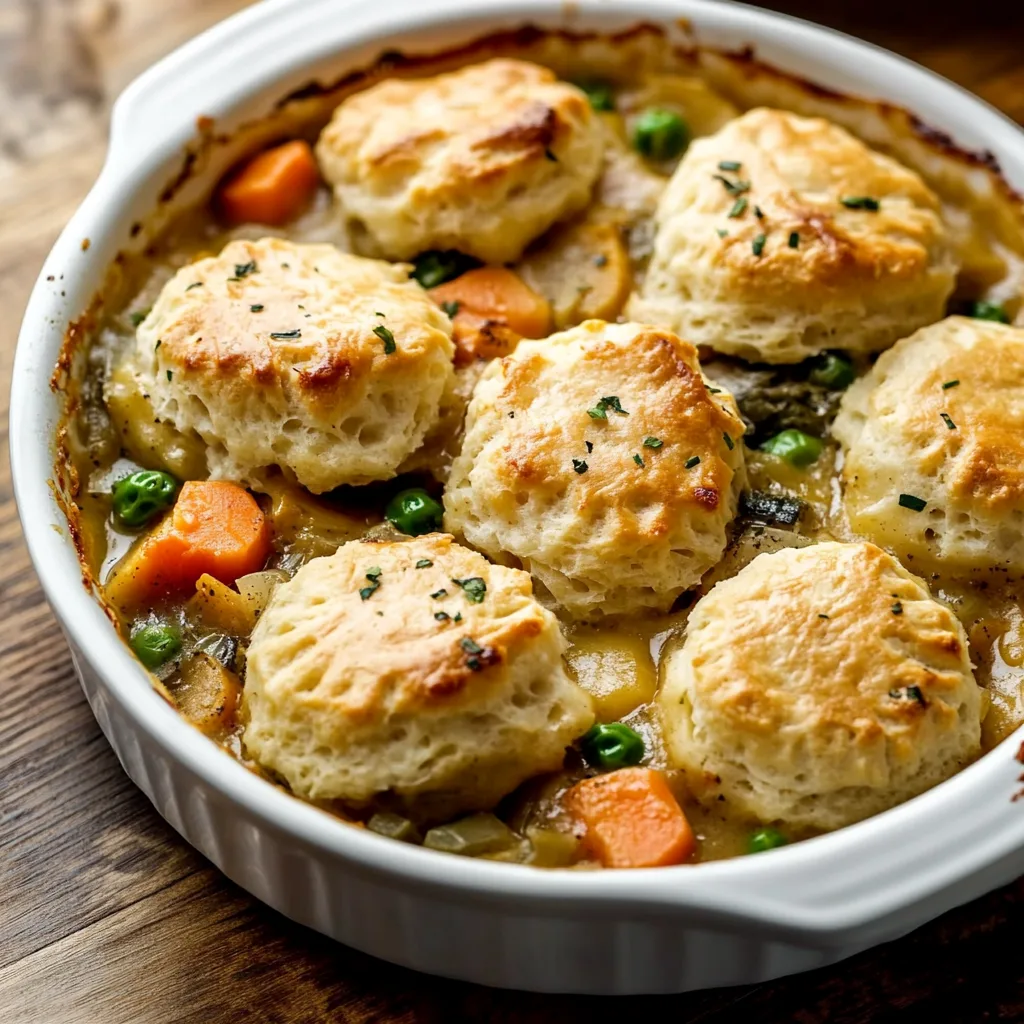
At its heart, this dish is a brilliant, stress-free remix of the traditional double-crust savory pie we all grew up loving. Instead of wrestling with a temperamental homemade pie dough that requires chilling, rolling, and inevitable tearing, this recipe utilizes a clever casserole format. The bottom consists of a rich, velvety, deeply savory vegetable gravy packed with colorful, nutrient-dense veggies. The real magic happens on top, where a layer of fluffy, golden, scratch-made biscuits replaces the traditional top crust. As it bakes, the bottoms of the biscuits absorb those beautiful savory juices while the tops crisp up into a beautiful, buttery golden brown. It is the perfect marriage of a hearty stew and warm, fresh bread, all cooked together in one beautiful baking dish.
Reasons to Try Biscuit and Vegetable Pot Pie Casserole
If you are still on the fence about adding this to your weekly meal rotation, let’s break down exactly why this recipe deserves a permanent spot in your recipe binder.
- Sneaks in the Veggies: If you have notoriously picky eaters at home, this gravy is your new secret weapon. The rich, buttery sauce coats everything so beautifully that kids and husbands alike will happily gobble up their broccoli, carrots, and cauliflower without a single complaint.
- Ultimate Time-Saver: Traditional pie crusts take time, patience, and a lot of counter space. This casserole version eliminates the hardest part of pie-making entirely, letting you get a comforting meal into the oven in just about 40 minutes of hands-on time.
- Completely Customizable: You can easily adapt the filling based on whatever happens to be lingering in your crisper drawer or freezer. It is a fantastic “clean-out-the-fridge” meal that tastes like a gourmet luxury.
- Perfect for Meal Prep: You can easily assemble components of this dish ahead of time, making your weeknight dinner rush feel like an absolute breeze.
Ingredients Needed to Make Biscuit and Vegetable Pot Pie Casserole
Here is your shopping list for creating this ultimate comfort food masterpiece. Do not let the ingredient list intimidate you; most of these are basic pantry staples you likely already have on hand.
For the Homemade Biscuits
- 2 cups (250g) all-purpose flour (carefully spooned & leveled), plus extra for shaping
- 1 Tablespoon baking powder
- 1/2 teaspoon salt
- 6 Tablespoons (85g) unsalted butter, completely cold and cubed
- 1 cup + 2 Tablespoons (270ml) whole milk, divided
For the Savory Veggie Filling
- 1/4 cup (4 Tablespoons; 56g) unsalted butter
- 1 cup (130g) diced yellow onion (about half of a large onion)
- 1 cup (130g) sliced or diced carrots
- 1 cup (120g) sliced or diced celery
- 1 cup (120g) roughly chopped fresh mushrooms
- 3–4 garlic cloves, finely minced
- 1/3 cup (42g) all-purpose flour
- 1 teaspoon salt
- 1/2 teaspoon freshly ground black pepper
- 2 teaspoons fresh thyme leaves (or 1 teaspoon dried thyme)
- 2 cups (480ml) high-quality vegetable broth
- 1/2 cup (120ml) whole milk
- 2 cups (about 300g) mixed vegetables (such as frozen peas, broccoli florets, and cauliflower florets)
- 2 Tablespoons chopped fresh parsley (or 2 teaspoons dried parsley)
Instructions to Make Biscuit and Vegetable Pot Pie Casserole – Step by Step
Creating this gorgeous meal is incredibly simple when you follow this strategic Step by Step guide. Let’s walk through the entire process together so you can achieve perfect results on your very first try.
Step 1: Whisk the Dry Biscuit Base
Grab a large, sturdy mixing bowl to begin your biscuit journey. Pull out your measuring cups and add your two cups of all-purpose flour, making sure you spoon and level it rather than scooping directly from the bag. Drop in your full tablespoon of baking powder and your half teaspoon of salt. Take a wire whisk and vigorously blend these dry ingredients together for about thirty seconds. This simple act distributes the baking powder evenly, which ensures your biscuits rise beautifully in the oven later.
Step 2: Cut in the Cold Butter
Retrieve your six tablespoons of cold, cubed unsalted butter directly from the refrigerator. It is vital that the butter remains ice-cold for maximum flakiness. Drop the butter cubes into your flour mixture. Grab a pastry cutter, or simply use two forks, and work the butter into the flour with a steady, pressing motion. Keep working until the mixture transforms into a texture resembling coarse crumbs, with a few pea-sized pieces of butter still visible. These tiny pockets of butter will create beautiful steam vents as they bake, yielding an incredibly tender crumb.
Step 3: Mix the Shaggy Dough
Measure out exactly one cup of your whole milk, leaving the remaining two tablespoons aside for later. Pour the milk directly into the center of your flour and butter mixture. Use a rubber spatula to gently fold the ingredients together just until a cohesive dough starts to form. Do not overmix this dough, or you will activate the gluten and end up with tough, dense biscuits. The dough should look quite shaggy, rustic, and slightly wet to the touch. If it feels way too dry, toss in an extra splash of milk.
Step 4: Shape the Biscuit Discs
Generously coat your hands with extra all-purpose flour to prevent sticking. Divide your shaggy dough into eight or nine even portions. Gently shape each piece into a rustic disc that sits about one inch thick. Do not worry about making them look perfectly round or neat; a little rustic charm is exactly what we want for a cozy casserole. Place these shaped dough discs onto a parchment-lined baking sheet or plate. Cover them tightly with plastic wrap and pop them into the fridge to chill while you craft the filling.
Step 5: Sauté the Aromatics
Set a large skillet or a heavy-bottomed pot over medium heat on your stove. Drop in your four tablespoons of unsalted butter and let it melt until it is beautifully bubbly. Add your diced yellow onion, sliced carrots, celery, and chopped mushrooms to the pan. Toss in your minced garlic cloves as well. Cook this colorful mixture for about five full minutes, stirring occasionally with a wooden spoon. You want the vegetables to soften up beautifully and release their rich, natural liquids into the butter.
Step 6: Create the Thickening Roux
Sprinkle your one-third cup of all-purpose flour directly over the sautéed vegetables in the skillet. Add your teaspoon of salt, half teaspoon of black pepper, and two teaspoons of fresh thyme leaves. Stir the mixture constantly for about one to two minutes. This step is incredibly important because it cooks out the raw flour flavor and allows the flour to completely absorb the melted butter, creating a beautiful roux that will perfectly thicken your pot pie gravy.
Step 7: Simmer the Rich Gravy
Slowly pour your two cups of vegetable broth and your half cup of whole milk into the skillet, stirring vigorously as you pour. Bring the liquid up to a gentle boil, then turn the heat down slightly to maintain a steady simmer. Let the mixture cook for about seven to nine minutes. Watch closely as the liquid beautifully transforms from a thin soup into a thick, luxurious, velvety gravy consistency that clings beautifully to your wooden spoon.
Step 8: Fold in the Remaining Veggies
Remove your skillet entirely from the heat source. Dump your two cups of mixed vegetables, including your frozen peas, broccoli, and cauliflower florets, straight into the hot gravy. Stir in your fresh chopped parsley. Give the entire mixture a good stir to evenly distribute all those vibrant colors. Take a small spoonful, let it cool for a second, and give it a taste. Feel free to add a tiny pinch more salt or pepper if your tastebuds call for it. Let the filling cool for five minutes.
Step 9: Assemble the Casserole
While your savory filling cools down slightly, preheat your oven to 400°F (204°C). Grease a 2.5- or 3-quart baking dish generously with cooking spray or a little extra butter. Pour your warm, thick vegetable filling directly into the prepared baking dish, smoothing it out into an even layer. Retrieve your cold biscuit discs from the refrigerator. Arrange them neatly on top of the vegetable filling, squeezing them gently against each other if necessary to make them fit beautifully across the top.
Step 10: Brush and Bake to Perfection
Dip a pastry brush into your reserved two tablespoons of whole milk. Gently brush the tops of each biscuit disc; this little trick helps them develop a gorgeous lacquer and brown beautifully in the oven. Slide the casserole onto the center rack of your preheated oven. Bake at 400°F (204°C) for exactly twenty-five minutes. Without removing the dish from the oven, turn the temperature up to 425°F (218°C) and bake for an additional five to six minutes until the biscuit tops achieve a stunning, deep golden-brown color.
Step 11: Cool and Serve Hot
Carefully remove your bubbling hot casserole from the oven using sturdy oven mitts. Set the baking dish on a heat-safe counter or wire cooling rack. Let the dish rest and cool down for about five minutes before serving. This brief resting period allows the savory vegetable gravy to set up slightly so it doesn’t run all over your plate. Scoop out a generous portion, ensuring everyone gets a whole, fluffy biscuit and plenty of that rich veggie filling, and enjoy your cozy meal.
What to Serve with Biscuit and Vegetable Pot Pie Casserole
Since this dish already boasts a fantastic balance of carbohydrates, fats, and plenty of fiber-rich vegetables, it functions beautifully as a complete, all-in-one meal. However, if you want to stretch the meal a bit further or add a fresh element to your dinner table, a crisp, bright side dish balances the richness beautifully. A simple, crunchy garden green salad tossed with a tangy lemon vinaigrette or a classic Italian dressing offers an incredible contrast to the velvety, buttery pot pie gravy. Alternatively, you can serve a side of roasted dynamic green beans or a bright, peppery arugula salad dressed with a splash of balsamic vinegar.
Key Tips for Making Biscuit and Vegetable Pot Pie Casserole
Achieving absolute perfection with this dish comes down to a few simple, expert culinary secrets that elevate it from good to spectacular.
First, always prioritize keeping your biscuit butter ice-cold. If your kitchen is warm, chop your butter and pop it into the freezer for ten minutes before cutting it into the flour. Cold butter is non-negotiable if you want those flaky, sky-high layers.
Second, pay close attention to your vegetable broth selection. Some store-bought vegetable broths can be incredibly salty, while others lean surprisingly sweet. Stick to a low-sodium variety if you like having total control over your seasoning, and always taste your filling right before it goes into the baking dish.
Finally, do not thaw your frozen veggies ahead of time. Tossing them into the hot gravy while still completely frozen keeps them from turning mushy during their long bake in the oven, ensuring your peas and broccoli retain a beautiful, pleasant texture.
Storage and Reheating Tips for Biscuit and Vegetable Pot Pie Casserole
If you happen to have any leftovers of this comforting dish, you are in luck because it saves beautifully. Allow the casserole to cool down completely to room temperature first. Transfer the leftovers into an airtight container, or cover your baking dish securely with a layer of plastic wrap or aluminum foil, and store it in the refrigerator for up to five days.
When you are ready to enjoy a portion for lunch or dinner, reheating it correctly preserves that lovely biscuit texture. While the microwave works well for a quick, two-minute fix, it can leave your biscuits feeling a bit soft and soggy. For the best texture, place your desired portion in an oven-safe dish, tent it loosely with aluminum foil to prevent the top from over-browning, and warm it up in a 350°F (177°C) oven for about fifteen minutes until the filling is hot and bubbling.
FAQs
Can I use store-bought canned biscuits instead of making them from scratch? Absolutely. If you are experiencing a true time crunch, you can substitute the homemade biscuit portion with a tube of high-quality refrigerated canned biscuits. Simply prepare your vegetable filling exactly as written, pour it into your baking dish, and arrange the canned biscuit slices right on top of the warm filling immediately before sliding the dish into your preheated oven. Bake according to the package directions on the biscuit tube, keeping a close eye on them so the tops do not burn.
Can I add a protein like chicken or turkey to this casserole? Yes, this recipe adapts beautifully to the addition of meat. If you have leftover shredded rotisserie chicken or cooked holiday turkey in your fridge, simply fold two cups of the cooked meat into the gravy along with the frozen vegetables right before assembling the casserole. It is a fantastic way to reinvent your leftovers into an entirely new, deeply satisfying family meal.
Can I make this recipe dairy-free or vegan? You can easily modify this dish to accommodate dairy-free diets. Replace the butter in both the biscuit dough and the filling with your favorite stick-style plant-based butter alternative. Swap out the whole milk for a rich, unsweetened non-dairy milk like plain oat milk, which offers a wonderfully creamy texture that mimics traditional dairy beautifully.
Final Thoughts
At the end of a long, chaotic week, you deserve a dinner that feels like a warm hug but doesn’t require a mountain of dishes or hours of your precious time. This Biscuit and Vegetable Pot Pie Casserole delivers that exact magic, combining rustic, old-school comfort with modern, practical convenience. It is a wholesome, heartwarming dish that proves you don’t have to sacrifice flavor or nutrition just because life gets busy. Gather your ingredients, follow our simple Step by Step guide, and treat yourself to a beautiful,

Biscuit and Vegetable Pot Pie Casserole
- Prep Time: 20
- Cook Time: 45
- Total Time: 65
- Yield: 8 servings 1x
- Category: dinner
- Method: Baking
- Cuisine: American
- Diet: Vegetarian
Description
A comforting, family-friendly casserole with savory vegetable stew and golden biscuits on top. Perfect for busy weeknights and chilly evenings.
Ingredients
1 cup all-purpose flour
2 tbsp vegetable shortening
1 tsp baking powder
1 pinch salt
2 cups buttermilk
2 tbsp melted margarine
2 tbsp milk
1 tbsp apple cider vinegar
2 cups mixed vegetables (carrots, peas, corn)
1 small onion, diced
2 cloves garlic, minced
1 cup vegetable broth
1/2 cup heavy cream (or unsweetened almond milk)
1 tbsp tomato paste
1 tsp dried thyme
1/2 tsp salt
1/4 tsp black pepper
Instructions
Preheat oven to 375°F
In a bowl, whisk flour, baking powder, salt, and shortening
Cut shortening into flour mixture with a pastry blender
Add buttermilk, margarine, and milk; mix into a dough
Turn dough out onto floured surface
Roll to 1/4-inch thickness; cut into 8 biscuits
Transfer to casserole dish
Return to oven and warm biscuits 5-7 minutes
Meanwhile, sauté onions, garlic, and carrots in margarine
Add broth, cream, tomato paste, thyme, salt, and pepper
Bring to boil, then reduce to simmer
Stir in peas/corn and apple cider vinegar
Taste and adjust seasoning if needed
Layer vegetable mixture over warm biscuits
Notes
Vegetables can be customized based on season/favorites
For gluten-free variation: substitute 1cup flour with gluten-free flour blend
Casseroles store well frozen (unbaked) up to 3 months
Nutrition
- Serving Size: 1 casserole serving
- Calories: 320
- Sugar: 2g
- Sodium: 450mg
- Fat: 12g
- Saturated Fat: 7g
- Carbohydrates: 45g
- Fiber: 3g
- Protein: 8g
- Cholesterol: 50mg